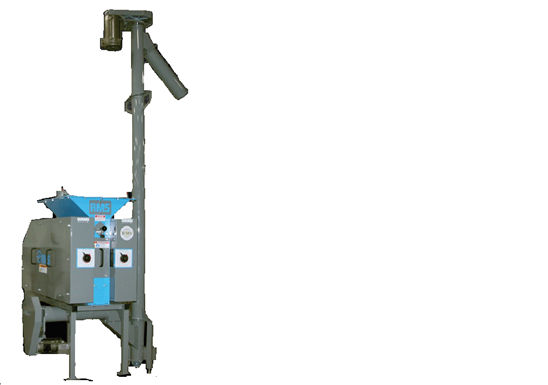
Vertical Auger
| Motor Location | Motor Size |
|---|---|
| Horizontal Auger | 1HP |
| Vertical Auger | 2HP |
| Belt Location | Quantity | Belt Size | Belt Tension |
|---|---|---|---|
| Horizontal Auger | 1 | A50 | 1.5 - 1.6 Lbs. |
| Vertical Auger | 2 | A47 | 2.4 - 2.5 Lbs. |
| Bearing Location | Bearing Type | Bearing Qty. |
|---|---|---|
| Horizontal Auger | 1" Square 4-Bolt Ball Bearing | 3 |
| Vertical Auger | 1-3/8" Square 4-Bolt Roller Bearing | 1 |
Installation
Installing Horizontal Portion of Auger to Mill:
Position the horizontal section of the auger under mill, so the mounting flange of the transition discharge lines up with the mounting flange on auger, as depicted in image below. RMS provides a strip of adhesive backed foam seal to be used between the two flanges to make the joint dust tight. Secure the auger to the mill with 3/8” flange bolts and nuts, as shown in image.
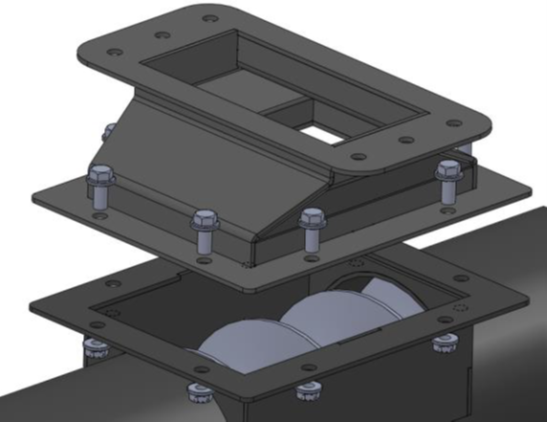
Installing Vertical Portion of Auger to Horizontal Section:
Position the vertical section of the auger under the horizontal section so the mounting flanges of both sections are aligned, as depicted in image below. Use the provided foam seal between the two flanges to make the joint dust tight. Secure the two sections together using the 3/8” flange bolts and nuts, as shown in image. A lifting bracket has been provided on the vertical section to aid in positioning the vertical section.
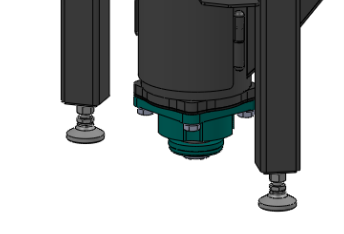
Leveling Vertical Auger:
Adjust leveling feet on the bottom of the vertical auger legs, then secure in place by tightening the lock nuts.
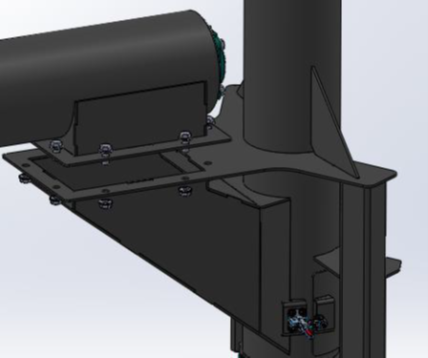
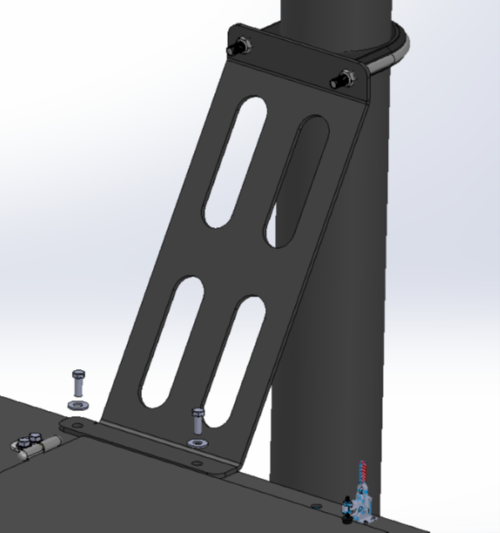
Securing Vertical Auger to Mill with Support Bracket:
Clamp the support bracket to the vertical tube with the “U”- bolt clamp, and to the mill with two 3/8” bolts and nuts. Depending on the overall height of the vertical auger, additional support may be needed to secure the vertical section.
For additional information on assembling multiple sections of auger together, see Assembly Instructions
Lubrication
All bearings should be greased following the greasing schedule mentioned below. Before greasing, grease zerks should be cleaned to prevent contaminants from entering the bearing.
The bearings on the vertical auger cannot be over greased. Any excess grease will purge through the seals on the front and rear of the bearing. Grease the bearings on the auger once per month, located on the horizontal section (two) and vertical section (at top). Grease these three ball bearings with 1-2 pumps monthly. The roller bearing is the bottom bearing on the vertical section. Grease the roller bearing with 2-3 pumps monthly. Note that a small amount of grease at frequent intervals is preferable to a large amount at infrequent intervals.
Note: Bearings from RMS come greased and ready for operation. Bearings directly from the manufacturer should be greased to purge.
Note: RMS suggests any lithium-based NLGI #2 grease such as “Feedmillube” which can be purchased through RMS or online at Feedmillube.com
Belt Tension
Adjusting Belt Tension
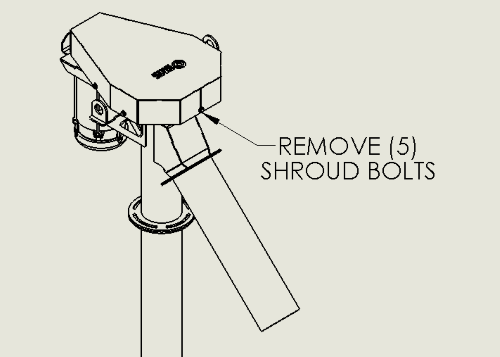
- Before adjusting belt tension, the shroud around the belts will need to be removed. Remove the (5) bolts around the outside of the shroud, and lift the shroud up and off of the tabs.
- Next, crack the (4) lock bolts loose that are holding the motor in place. >Note: Do not completely remove these bolts as the motor could fall.
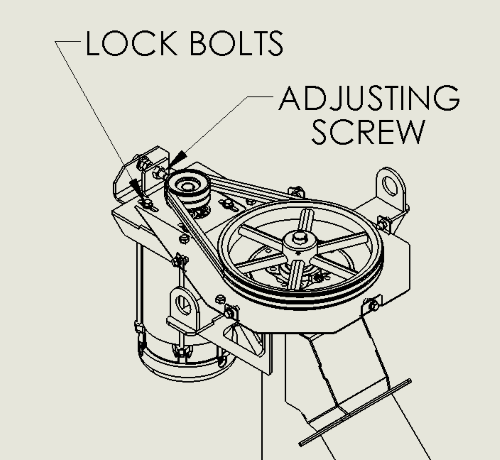
- Adjust the belt tension by turning the adjusting screw counter-clockwise to increase tension, and clockwise to decrease tension. Once desired tension has been achieved, tighten the lock bolts and reinstall the shroud.
For additional information on tensioning belts, see Belt Tension.
Electrical Instructions
RMS strongly suggests you hire a licensed electrician for the initial install of the electrical components.
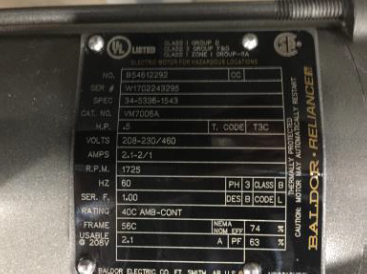
For additional wiring information, consult the wiring legend on the motor as in the photo below.
Motor/ Auger Rotation
The motors for both the horizontal section and the vertical section should spin counter-clockwise. Both of these directions are determined when looking at the shaft side of the motor. (See image below). This means the motor for the horizontal auger needs to spin counter-clockwise, and the motor for the vertical auger needs to spin clockwise.

Important: Check and clean motors at least monthly to ensure they are free from contaminates. This ensures the motors are able to adequately cool themselves and avoid overheating.
To avoid serious injury: Always complete this task when all power sources to each motor have been disabled and motors have cooled down!
Interlocking
Interlocking the electrical components on a roller grinder is one of the most important steps when installing a machine. You must interlock the main grinding motors to the downstream take away equipment. In this case, the vertical auger should be interlocked to the mill to prevent the mill from starting if the auger is not energized. This is critical to ensure that the roller grinder shuts off if the one of the components downstream stops running for any reason.