A consistent quality brew is vital to making sure your beer meets customer expectations. To assist in this, you may use a variety of different tools to evaluate aspects of your brew: hydrometer and refractometer to measure gravity, ph meter to measure ph, microscope to measure yeast cell counts, etc. For the same reasons it’s vital to check all these and measure these components of your brew, you also need to consider the sieve (or grist) test because it’s one of the most simple and inexpensive tests you can do to ensure that you’re producing consistent and quality beer.
What is a Sieve Test?
 A sieve test – in short – is an analysis of your milled grain to ensure you are producing a correct and consistent crush. Sieve tests, as the name suggests, uses a collection of stacked sieves with different sized holes to measure the amount of grain that is finely milled. The amount of finely milled grain you need is dependent on the type of beer you are brewing, but a sieve test is essential to ensure that each of your brews are receiving the correct crush.
Are You Getting the Most From Your Mill?
Doing a sieve test will tell you if you’re getting the most from your mill. If your grind is too coarse, you are wasting valuable starches and reducing your brewing efficiency. Grist that is too fine is also a problem, as it will prevent a proper filter bed from forming.
With a sieve test, you’ll know exactly how much extract you’re getting from each batch, and help control your costs. When your process is inefficient, you’ll need more extract, which will require more malt, and that will increase your costs.
How to Do a Sieve Test
 Sieve tests are easy, especially when you have a sieve test set. Here’s what you’ll need to conduct a sieve test for brewing:
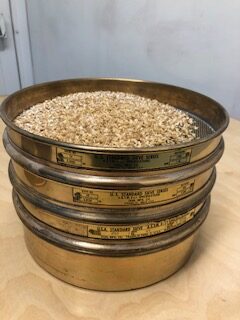
- A Sieve Set that consists of a cover to avoid the grist escaping during the test, and three sieves of different sizes. You’ll need one number 14 sieve, one number 30, and one number 60. The fineness of the sieve goes down as the numbers go up. The set also includes a pan bottom that catches any of the fine material that is left over after the grist goes through the three sieves.
- A scale that measures in grams.
- A container to weigh the grist.
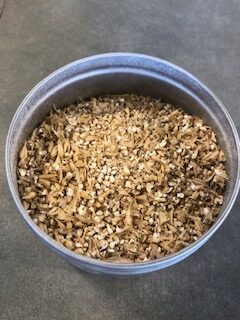
- A grist sample from your mill.
Then, complete these simple steps to conduct your test:
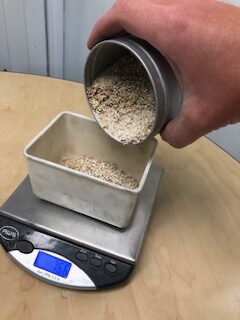 Weigh your container for the grist and zero out your scale to account for the weight of the container.
- Measure 100 grams of grist into the container.
- Stack the sieves in order with the pan at the bottom.
- Pour the 100 gram sample into the first sieve.
- Place the cover on top of the stack.
- Shake the stack from side to side for five minutes.
- Remove the cover.
- Weigh each sieve and the bottom pan, noting your results.
Your goals will vary depending on your mill and where you take the sample from. But, as a rule of thumb, you want to achieve this distribution:
- Number 14: 50-65%
- Number 30: 20-30%
- Number 60: 10-20%
- Bottom pan: 10%
It’s up to you to determine how often you want to conduct a sieve test. Different breweries brew at different frequencies, change suppliers at different times, and include other variations in their operations that would affect their decision. The important thing is to make sieve tests part of your standard maintenance routine.
How RMS Roller-Grinder Can Help
When you’re ready to implement or improve your sieve tests, RMS can help. If you want to learn more about sieve tests, how they work, or what they can do for you, call us at 805-368-9007. We have sets available for purchase. And, please feel free to request a quote for any of our brewing equipment.